Category Archives: Desserts

Chocolate Chip Cookies for two (or one!)

I am a self confessed cookie monster.  The dessert I’d most consistently choose over other desserts is a warm chocolate chip cookie with a chewy gooey center and crispy toffee edges.  In fact, whenever I make cookie dough, I always form the dough and bake only what I’m going to eat at that specific time, so that I always have my cookies warm.  I’ll put the extra dough in the fridge, then bake some more cookies whenever the urge strikes me.  Once a day, twice a day…the worst test of willpower you could ever give me.  Which is why the concept of this recipe is genius to me- the best way to portion control?  Only make a tiny amount of dessert.  This is usually hard to do, and even those who are baking for only one or two need to make an entire batch of cookie dough, a dozen cupcakes, etc.  This recipe combines just enough ingredients to make exactly four cookies.  Genius!  All in one bowl, greatly saving on messy items and time.  It seriously took two minutes for the dough to come together.  My next post will be on cupcakes for two, another life changing.  Enjoy these cookies knowing that you don’t really have the option to binge, and customize them however you want (with m&ms, white chocolate chips,butterscotch chips, nuts, etc.)

Chocolate Chip Cookies for Two (or One) adapted from Bakergirl

1/4 cup + 1 tablespoon flour

1/8 teaspoon baking soda (just eyeball half of a 1/4 teaspoon measure)

A pinch of salt

A pinch of cinnamon

2 tablespoons shortening (feel free to substitute butter)

2 tablespoons brown sugar (I used light brown, but will use dark brown next time for a more pronounced flavor)

1 tablespoon granulated sugar (1/2-3/4 tablespoon would have been sufficient)

1 tablespoon beaten egg

1/4 teaspoon vanilla extract

1/4 cup chocolate chips

Preheat oven to 350°F. (170 C)
Mix together the shortening, brown sugar, and granulated sugar. Add the tablespoon of beaten egg and vanilla and mix until combined. Add the flour, baking soda, salt, and cinnamon and mix until just combined. Stir in the chocolate chips.
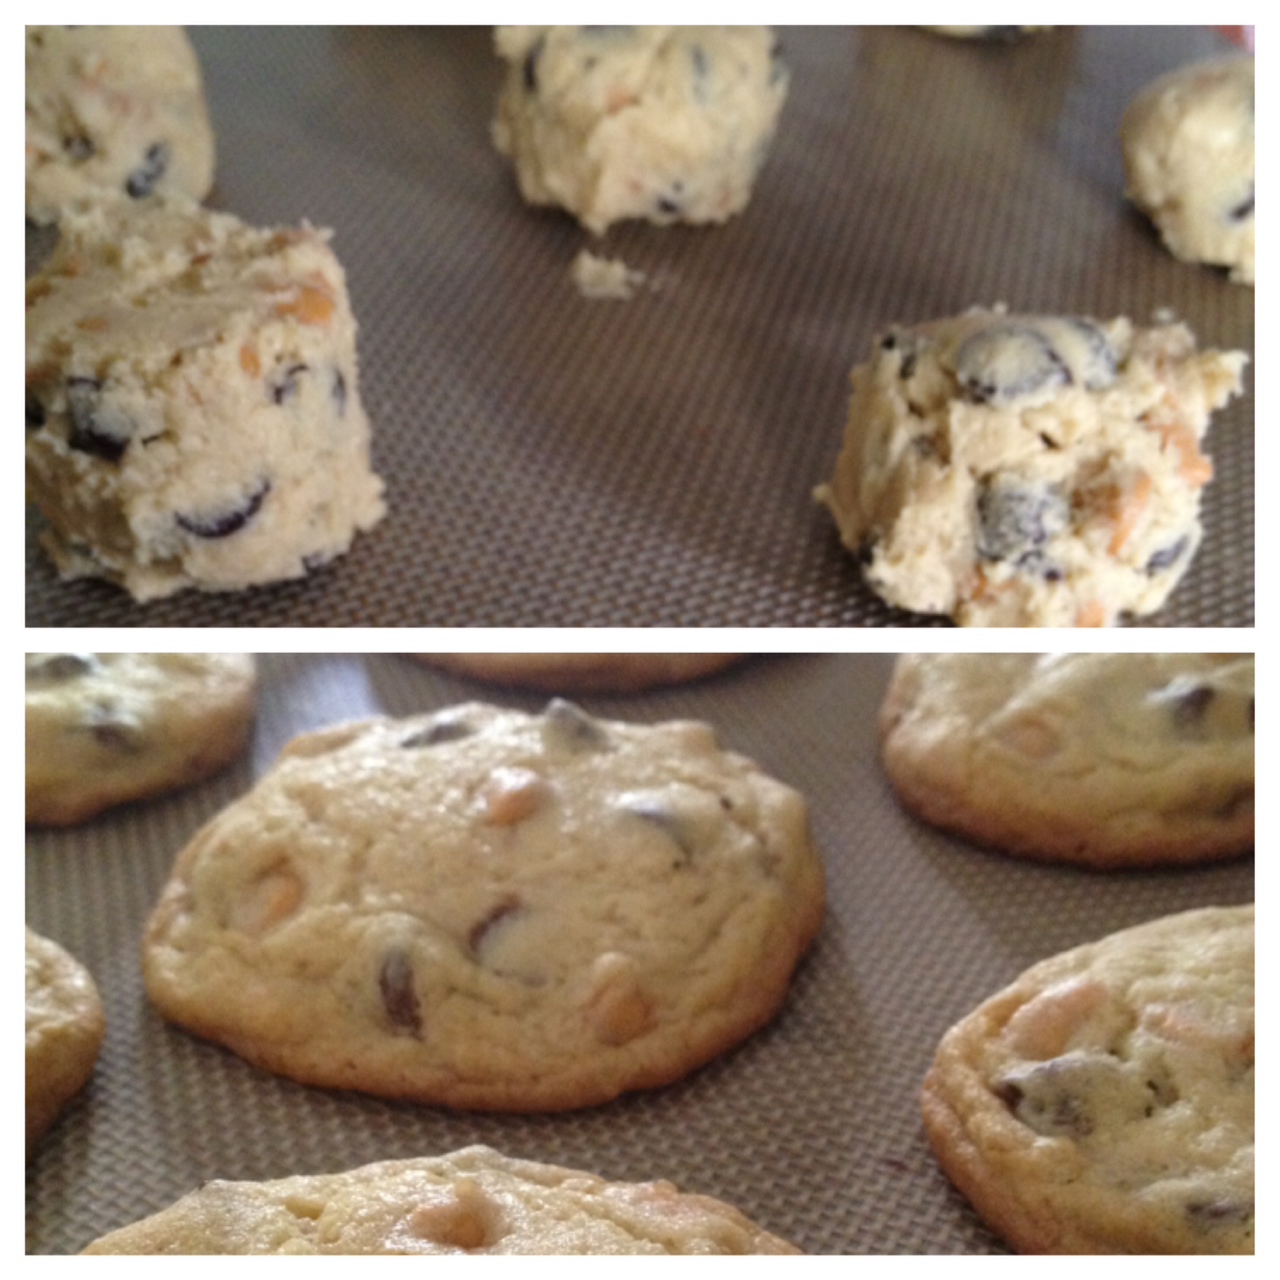
Roll dough into four cookie balls and place them on a lightly greased cookie sheet. Flatten them slightly with your hand.  Bake for 12-15 minutes until golden brown.

How cute is this tiny ball of cookie dough?

1 Comment

Filed under Cookies, Cooking for Two

Sour Cream Coffee Cake

If I’m going to imagine my ultimate dessert, it wil probably be something rich and chocolatey, gooey and warm. Or maybe my all time favorite, chocolate chip cookies with smooth chewy toffee centers and crispy edges. But every once in a while, I’ll feel like a really simple, plain coffee cake. The type with buttery white cake swirled with cinnamon and toped with a nutty crispy streusel. I’ve tried several recipes, all delicious, but this one by Ina Garten baked in a bundt cake pan made for an ideal dessert to take to a friends house that was met with rave reviews. The texture of the cake is made super light and fluffy by using cake flour instead of all purpose, and the streusel baked in the center gave a nice edge over coffee cakes that are only topped with streusel. I had cake flour with me, from the states (I haven’t yet found in Bahrain) but there is a really easy substitute that I’ll list below. Take this with you next time you are invited anywhere, and you’ll be invited back really soon!

Sour Cream Coffee Cake adapted from Ina Garten

Ingredients

  • 12 tablespoons (1 1/2 sticks) unsalted butter at room temperature
  • 1 1/2 cups granulated sugar
  • 3 extra-large eggs at room temperature
  • 1 1/2 teaspoons pure vanilla extract
  • 1 1/4 cups sour cream
  • 2 1/2 cups cake flour (not self-rising) *
  • 2 teaspoons baking powder
  • 1/2 teaspoon baking soda
  • 1/2 teaspoon kosher salt

*Click this link for a step by step tutorial on how to subsitute normal flour for cake flour.  It’s really easy, doesn’t really need a tutorial but this really helps illustrate it.

For the streusel:

  • 1/4 cup light brown sugar, packed
  • 1/2 cup all-purpose flour
  • 1 1/2 teaspoons ground cinnamon
  • 1/4 teaspoon kosher salt
  • 3 tablespoons cold unsalted butter, cut into pieces
  • 3/4 cup chopped walnuts, optional (I love nuts in baking, so I added the walnuts.  Pecans would be great too!)

* For the glaze:

  • 1/2 cup confectioners’ sugar
  • 2 tablespoons real maple syrup

* I actually made the glaze, using real maple syrup no less, tasted it, and immediately decided not to use it.  I felt the cake would be more than sweet enough, and I didn’t regret my decision.  If you feel like you’d like the glaze on your cake by all means go ahead!

Directions

Preheat the oven to 350 degrees F (175 C). Grease and flour a 10-inch tube pan.

Cream the butter and sugar in the bowl of an electric mixer fitted with the paddle attachment for 4 to 5 minutes, until light. Add the eggs 1 at a time, then add the vanilla and sour cream. In a separate bowl, sift together the flour, baking powder, baking soda, and salt. With the mixer on low, add the flour mixture to the batter until just combined. Finish stirring with a spatula to be sure the batter is completely mixed.

For the streusel, place the brown sugar, flour, cinnamon, salt, and butter in a bowl and pinch together with your fingers until it forms a crumble. Mix in the walnuts, if desired.

Spoon half the batter into the pan and spread it out with a knife. Sprinkle with 3/4 cup streusel. Spoon the rest of the batter in the pan, spread it out, and scatter the remaining streusel on top. Bake for 50 to 60 minutes, until a cake tester comes out clean.  Cool on a wire rack for 30 minutes, and if using the glaze drizzle it on top when the cake is completely cool.

2 Comments

Filed under Cakes, Desserts, Uncategorized

Super Easy- No Bake Nutella Cheesecakes

Today is Friday, and do you know what that means? Friday is nutella cookie day at sugar daddies bakery. I know sounds good right? Well I wouldn’t know, you see hubby refused to take me since I’ve had cupcakes practically every day this week and he’s taken it upon himself to make sure I don’t develop diabetes. So in order to satisfy my nutella craving, I invited my friends over and told him I had to whip something up to serve them. These individual no-bake nutella cheescakes are so yummy and come together in less than 10 mins. You probably have all the ingredients on hand, so make these now and thank me later !


Ingredients

  • 12 Oreo cookies
  • 2 Tablespoons butter softened
  • 1 teaspoon milk
  • 200 grams cream cheese, softened
  • 3/4 cup nutella
  • 3  tablespoons plus 1 cup heavy cream

Place the cookies in blender and pulse until they form crumbs. add the butter and the milk. Divide cookie crumbs between 4 serving cups

Whip together cream cheese, nutella, and 3 tablespoons heavy cream. Spoon over cookie crumbs.

Whip the remaining1 cup of heavy cream into soft peaks, spoon over the nutella mixture.

Enjoy!

-M

Leave a comment

Filed under Cheesecake, Desserts

Honey Chamomile Cupcakes


This recipe forever won a way into my heart.  You are going to love me for sharing this with you.  It’s one of my favorite cupcake recipes , and the combination of ingredients is so delicate, unexpected and pleasing.  Don’t be nervous about the tea! It gives such a mild enhancement to the flavor even unadventurous people will like this.  I got this recipe from the Joy the Baker cookbook, the source of many excellent recipes, and I highly advise you try these for any gathering, bridal shower, tea party, breakfast or brunch you have.  In short, try these whenever and wherever and you’ll find them to be a crowd pleaser.  They come together in no time which is such a plus for a dessert.  I made them after my morrocan tagine and curried couscous dinner, and the exotic flavor in the cupcake really worked well with the above.   The cupcakes are infused with delicate chamomile flavor which pairs perfectly with the honey icing on top.  I’d love to experiment with other tea flavors too! They look so pretty, and they taste even better then they look. For maximum effect serve with tea…we had authentic morrocan tea with these…Enjoy!

Honey Chamomile Cupcakes adapted from Joy the Baker Cookbook

For the Cupcakes:

1/4 cup (1/2 stick) unsalted butter, softened

1 cup all-purpose flour

3/4 cup granulated sugar

1 teaspoon baking powder

1/2 teaspoon baking soda

pinch of salt

3 tablespoons dried chamomile (tea bags)

1/2 cup milk (low fat works fine)

1 large egg

1 teaspoon pure vanilla extract

For the Glaze:

1 cup powdered sugar, taste and add extra 1/2 cup if desired

1 tablespoon honey

about 5 tablespoons heavy cream

pinch of salt

Place a rack in the upper third of the oven and preheat oven to 325 degrees F.  Line a cupcake pan with paper or foil liners and set aside.

To make the cakes:  in the bowl of an electric stand mixer fitted with a paddle attachment, cream together butter, flour, sugar, baking powder, baking soda, pinch of salt, and chamomile leaves.  Mix on medium speed until the mixture is slightly coarse and sandy.  This takes about 5 minutes.

While the mixture beats, in a small bowl, whisk together milk, egg, and vanilla extract.

Pour half of the milk mixture into the flour mixture.  Beat until just incorporated.  Pour in the remaining milk mixture, turn the mixer up to medium-high speed and beat for 1 minutes, until well blended.

Divide the batter between the prepared cups.  There isn’t a lot of batter so you’ll only fill the cups up half way.  You’ll also need to scrape the bowl for remaining batter.  This recipe doesn’t waste a drop.

Bake the cupcakes for 17 to 20 minutes, or until a skewer inserted in the center comes out clean.  Remove from the oven and allow to cool in the pan for 10 minutes.  Remove the cupcakes from the pan to cool completely before frosting.

To make the glaze: in a medium bowl, whisk together powdered sugar, honey, cream, and salt.  Whisk until smooth.  Use a butter knife to generously spread the frosting atop the cooled cupcakes.  Sprinkle with just a bit of chamomile tea leaves and arrange on a pretty plate.  Cakes will last, well wrapped, at room temperature for up to three days.

Leave a comment

Filed under Cakes, Cupcakes, Desserts

Fall Apple Recipes

It’s October 1st! And although it still might not feel like it, it’s definitely time for some fall cooking.  Apples are a staple of autumn cooking, and everywhere you look are enticing recipes combining apples with cinnamon, crumb topping, caramel, and oatmeal.  So even if it’s 90 degrees outside where you are, get into the fall baking mood and try some of these recipes that caught my eye!  You’ll probably see blog posts on them very soon:

Apple Butter Cake

Dutch Apple Pie

Apple Crumble Pie

Apple Pancakes

Apple Pie Cookies

Some savoury options:

Apple and Gouda Quesadillas

Harvest Apple and Spinach Salad

And don’t forget options from everylittlecrumb!

Caramel Apple Bars

Apple Tart with Hazelnut Brown Sugar Topping

Leave a comment

Filed under Apple, Desserts

Peanut Butter Cup Cookies

I needed to make something for a friends house, it needed to be awesome, and I needed to have the ingredients beause I was too lazy to go to the supermarket.  Voila! I was led to this recipe which is definitely going to be repeated many times.  What’s great about them is that they are really easy, don’t take much time at all, but look like they are hard to make and take forever! Now, you need to make these because:

1. They are chocolate cookies stuffed with a creamy peanut butter mixture.

2. You probably already have the ingredients, and they are super easy.

3. THEY ARE CHOCOLATE COOKIES STUFFED WITH PEANUT BUTTER!

Now, let’s get started!

Recipe adapted from Brown Eyed Baker

For the Cookies:

1½ cups all-purpose flour

½ cup unsweetened cocoa powder

½ teaspoon baking soda

¼ teaspoon salt

½ cup unsalted butter, at room temperature

½ cup granulated sugar (plus more for rolling)

½ cup light brown sugar (I didn’t have so I used dark brown)

¼ cup creamy peanut butter

1 egg

1 teaspoon vanilla extract

For the Filling:

¾ cup creamy peanut butter

1/2 cup powdered sugar (Recipe called for 3/4 cup, but I didn’t want it to be too sweet)

1. Preheat oven to 375 degrees F. Line a baking sheet with parchment paper; set aside.

2. In a medium bowl, whisk together the flour, cocoa powder, baking soda and salt; set aside.

3. With an electric mixer on medium speed, cream together the butter, sugars and peanut butter until light and fluffy, about 3 minutes. Add the egg and vanilla extract and beat to combine. Reduce the speed to low, add the flour mixture and mix until combined.

4. In a separate medium bowl, mix together the peanut butter and powdered sugar for the filling until smooth.  Taste sweetness, and add more if you want.  I like adding less because then the peanut butter flavor really shines through, with a touch of saltiness that adds a lot to the cookie.

5. In a small bowl, put some extra granulated sugar for rolling the cookies.

6. Use a medium cookie scoop (or heaping tablespoon) of cookie dough and flatten it with your hands. Take about 1 teaspoon of the peanut butter filling (or a small cookie scoop) and place it in the center of the chocolate dough. Wrap the chocolate dough around the peanut butter center, pressing to seal.  I don’t have cookie scoops so used a tablespoon and a teaspoon.  Add a heaping teaspoon of peanut butter, I didn’t add enough and had a little filling left over. Roll the cookie into a ball and roll in the sugar. Place the cookies on the prepared baking sheet about 2 inches apart. Flatten each cookie slightly with the palm of your hand.

7. Bake for 7 to 9 minutes. Let cool on the baking sheet for 2 minutes, then remove to a wire rack to cool completely. Store cookies in an airtight container at room temperature.

2 Comments

Filed under Cookies, Desserts

Oreo Tunneled Bundt Cake

For me bunt cakes are one of my favorite cakes to bake. They look stunning, not like plain old sheet cake. Also, they are easy to make, not like those layered cakes which need a special occasion to really shine. This bunt cake has an added bonus of an Oreo cream cheese filling sandwiched between two layers of moist, gooey chocolate cake.

Of course I forgot to take a picture after we sliced it so you could see the ribbon of cream  cheese running through the cake, I guess I was too busy stuffing my face! But you have to trust me, you will love it. Just picture the creamy filling in stark contrast to the dark cake. I used Hershey’s recipe for the cake but you could be lazy and just use a box cake mix. It will still taste amazing I promise.

For the cake:

Ingredients

  • 2 cups sugar
  • 1-3/4 cups all-purpose flour
  • 3/4 cup  Cocoa
  • 1-1/2 teaspoons baking powder
  • 1-1/2 teaspoons baking soda
  • 1 teaspoon salt
  • 2 eggs
  • 1 cup milk
  • 1/2 cup vegetable oil
  • 2 teaspoons vanilla extract
  • 1 cup boiling water

For the filling

  • 1 package cream cheese (8oz or 200g) softened
  • 2 eggs
  • 1 teaspoon vanilla extract
  • 1/3 cup sugar
  • 1/2 cup chopped Oreos
  1. Heat oven to 180C. Grease and flour a large bunt pan.
  2. For the cake:  Stir together sugar, flour, cocoa, baking powder, baking soda and salt in large bowl. Add eggs, milk, oil and vanilla; beat on medium speed of mixer 2 minutes. Stir in boiling water (batter will be thin).
  3. In a separate medium sized bowl mix together the cream cheese and sugar. Add eggs one at a time. Add the vanilla.Fold in the chopped Oreos.
  4. In the bunt pan pour in half the cake batter. Then spoon the cream cheese filling on top. Finish by pouring the second half of the cake batter.
  5.  Bake 50 to 60 minutes or until wooden pick inserted in center comes out clean. Cool 10 minutes; remove from pans to wire racks. Cool completely.
  6. To make the glaze, just mix some confectioner’s sugar with milk until you reach your desired consistency. Pipe over the cooled cake.

Enjoy!

– M

Leave a comment

Filed under Cakes, Celebration Cakes, Uncategorized

Butterscotch Chocolate Chip Cookies

Having a baby makes you re-think the way you approach your every day tasks. You master the art of taking 5-minute showers, you get more accomplished during a 2 hour nap than you did during 4 day weekends, and you become skilled at typing with one  hand while juggling a crying baby in the other. So when I wanted dessert I had to think of something that I could make with the ingredients I already had. These cookies are quick, easy, and delicious! Here is what you need:

Image

Now butterscotch chips are not always available in Jordan, so you have to look in the major supermarkets. When I found these I grabbed 3 bags to stock up because I knew they would be disappearing soon. Don’t worry if you can’t find them, this recipe still makes a great chocolate chip cookie, just omit the butterscotch chips and double the semi-sweet.

Image

The cookies are best enjoyed fresh out of the oven, they have crispy edges and chewy centers. If you have any left the next day, you can blast them in the microwave for 15 seconds to get a warm gooey cookie. Image

Ingredients

1 stick unsalted softened butter

1/2 cup granulated sugar

1/2 cup packed light brown sugar

1 large egg

1 teaspoon vanilla extract

1 cup plus 2 tablespoons all purpose flour

1/2 teaspoon baking soda

1/2 teaspoon  salt

1 cup butterscotch chips

1 cup chocolate chips

Directions

  1. Preheat oven to 180 degrees C. and line a large baking sheet with nonstick paper.
  2. Place butter and sugars into a large bowl, mix until well combined, about 2 minutes. Add egg and vanilla, mixing until well combined.
  3. Add flour, baking soda and salt to bowl, mix just until incorporated then add butterscotch and chocolate chips mixing until just combined. Scoop heaped tablespoons of dough onto prepared cookie sheet, leaving space between then. Bake for 13-15 minutes or until nice and golden brown but still semi-soft in center. Remove and let cool on baking sheet for 5 minutes before transferring to cooling rack.

Happy Baking!

2 Comments

Filed under Cookies, Desserts

Caramel Apple Crumb Bars

I was basically forced into baking something for our football game yesterday, so I needed something portable that could feed a lot of mouths.  Bars are a type of dessert I like making, because they are usually easy and they are very portable.  A request from a friend was to make something “apple-y and cinnamony” and I saw this recipe a few days ago so he was lucky!  This also is a great recipe to use over any leftover caramel sauce (if you have any!) from the caramel sauce I bullied you into making.  You need around 3/4 cup or enough to make a thin layer over the batter in the pan you are using.  Ok, gather your ingredients, get into an autumn baking mood and start:

Caramel Apple Crumble Bars (adapted from Annie’s Eats)

Yield: 16 bars

Ingredients

For the filling:
2 tbsp. unsalted butter
4 large (or 5 medium) apples, peeled and sliced (I used 5 and had a little extra, a mix of 2 green apples and 3 red)
3 tbsp. sugar
1 tsp. ground cinnamon
Dash of grated nutmeg (Didn’t have any, so I used allspice)
*9 oz. caramel candies, unwrapped
*2 tbsp. heavy cream
*I’ve never found wrapped caramels in Bahrain, have any of you? So, substitute your already prepared caramel sauce (or, if you must, storebought jarred caramel sauce)

For the dough: 
1½ cups all-purpose flour
1 cup old-fashioned oats
1/3 cup sugar
1/3 cup brown sugar, lightly packed
¾ tsp. baking powder
½ tsp. salt
¼ tsp. ground cinnamon
12 tbsp. cold unsalted butter, cut into small pieces
1 large egg yolk
1 tsp. vanilla extract
½ cup chopped nuts, such as pecans or walnuts (optional)

 
 Directions
  • Preheat the oven to 375˚ F (190 C).  Line a 9 x 9-inch baking pan with foil or parchment paper.  Now, all my square pans were missing, so after throwing a temper tantrum I used an 11×9 inch rectangle baking pan, and had to make a little more of the crumb topping to compensate.  To make the filling, melt the butter in a large skillet over medium heat.  Stir in the apple slices, sugar, cinnamon, and nutmeg.  Cook, stirring occasionally, under the apples are golden brown and caramelized, about 15 minutes.  Remove from the heat.
  • Meanwhile, prepare the dough.  In a medium mixing bowl, combine the flour, oats, sugars, baking powder, salt and cinnamon and stir to blend.  Add in the butter pieces and cut into the dry ingredients using a pastry cutter or two knives until the mixture resembles coarse meal.  Add in the egg yolk and vanilla and stir with a fork or knead very briefly just until a crumbly dough comes together.  Transfer about two thirds of the dough mixture to the prepared baking pan and press down into an even layer.  Bake until light golden, about 12-14 minutes.

  • While the base is baking, combine the caramels and cream in a medium saucepan set over medium heat.  Melt the caramels, stirring occasionally, until the mixture is totally smooth.  Remove from the heat.  Once the base layer is baked, pour the caramel over the top.  Layer with the cooked apple slices.  Crumble the remaining dough over the top of the apple slices. (I was a little short, so I just added a few tablespoons extra of the oatmeal and flour and cinnamon and mixed in a bit more butter, you want to have enough streusel topping to cover the entire top)  Sprinkle evenly with the chopped nuts, if using.  I used pecans. Yum!
  • Bake about 22-25 minutes or until the top is golden brown.  Transfer the pan to a wire rack to cool.  Let cool completely before slicing and serving.  Enjoy! and share with your friends, they’ll love you even more.

8 Comments

Filed under Apple, Bars, Desserts

The Best Caramel Sauce You’ll Make

Salted Caramel Sauce

On the day I made eggplant parmesan, I wanted a simple dessert since I’d spent so much time in the kitchen already.  I also wanted to use up some of my extra brownie bites that I popped in the freezer.  Inspiration struck, or rather craving struck.  I decided to make homemade salted caramel sauce, then make sundaes with vanilla ice cream, caramel, brownie bites, toasted pecans and whipped cream.  Man, they were good.  Word to the wise, this salted caramel sauce will appeal to even caramel traditionalists, who like their sauce sweet without any added foodie twists (Amina, I mean you).  You barely taste the salt, it just highlights the sweetness of the sauce, and the reason for this is using salted butter as opposed to adding additional salt.  It tastes rich, and has a complex flavor that ready made caramel sauces lack.  It doesn’t taste like just any super sweet sugar syrup, you actually taste the toffee undertones.  It is surprisingly easy, requiring 5 minutes of active time, you just need to keep an eye on the caramel to make sure it doesn’t burn, because once going it cooks really fast.  Basically, just make this, and you’ll see exactly what I mean.  It lasts in a jar in the fridge for two weeks, and trust me you’ll find a lot of uses for it.  I’ll add some recipes with uses for the sauce very soon.

Caramel Sauce- Makes around 1 cup of sauce.  Source: Joy the Baker cookbook

  • 1 cup granulated sugar
  • 2 tablespoons water
  • 1 tablespoon corn syrup (I didn’t have this on hand so I substituted maple syrup-turned out great)
  • 6 tablespoons (3⁄4 stick) good-quality salted butter (I like an Irish or French butter)
  • 1⁄2 cup heavy cream, at room temperature
  • 1 teaspoon pure vanilla extract

Place a large, heavy-bottomed pot over medium-high heat.
Add the sugar, water, and corn syrup to the warming pan. Whisk the sugar occasionally as it begins to heat, to ensure that the sugar cooks evenly.

This is how it will look when you first start

 Cook the sugar to a nice dark copper color. The sugar will go from golden to dark copper fairly quickly. To help control the sugar, turn off the heat and move the pot to a cool burner just before you reach the dark color you’d like. The bottom of the pan will still be hot enough to continue to cook the sugar.
 Over low heat, whisk butter, all at once, into the copper-colored sugar. When butter is melted, pour in the cream. The mixture will bubble and froth, but keep mixing. When bubbling subsides, add vanilla extract. Stir. The caramel might feel too loose. Don’t worry; it will thicken as it cools.

You’re done! Enjoy this amazingness

 Store in a glass jar in the refrigerator for up to 2 weeks. To thin, warm in the microwave for a few seconds until you reach the desired consistency.

4 Comments

Filed under Caramel, Uncategorized